by Chef Chris Galipeau
Ever stood in the grocery store, squinting at a jar’s ingredient list, wondering what half of it even means? Preservatives, additives, or that jaw-dropping price tag—it hits you. There’s a disconnect between you and the food you eat. Homemade food changes that. It’s not a trend; it’s a return to real. Here are five store-bought staples you can easily make at home—affordably, deliciously, and with a story to tell. Don’t worry if you’re new to this—each method is beginner-friendly, and I’m sharing personal moments and tips to guide you every step of the way. Let’s dive in.
1. Hot Sauce – Craft Your Perfect Heat
Hot sauce didn’t just enter my kitchen; it burst in. Years ago, while working at a country club, I planned an employee appreciation day—a hot wing challenge to bring some fun to a long shift. I was tired of commercial sauces with gimmicky names and one-dimensional heat, lacking the complexity I craved. Late nights in my tiny apartment, roasting peppers with the windows flung open and my dog hiding from the spicy fumes, I created ten sauces—from maple chipotle to vodka-infused ghost pepper. My coworkers cheered (and sweated) through the tasting, begging for bottles to take home. That spark ignited Porcupine Pepper Co., my small-batch hot sauce brand, turning a challenge into a passion for vibrant flavors.
Why Make It?
Homemade hot sauce gives you control over flavor, heat, and creativity. Love fruity ferments or smoky roasts? It’s fast, fun, and deeply rewarding.
Quick Method
Ingredients:
-
- 4–6 roasted habanero, jalapeño, or serrano peppers (or a mix)
-
- 1 small onion, roasted or charred
-
- 4 garlic cloves, roasted
-
- 1 small carrot, peeled and sliced
-
- 1 tbsp tomato paste or roasted tomato
-
- 1 cup white vinegar (or mix with cider or rice vinegar for a softer profile)
-
- Juice of 1 lime
-
- 1 tsp salt
-
- 1 tbsp honey (optional for balance)
-
- Water to thin, if needed
Instructions:
-
- Roast peppers, onion, garlic, and carrot until charred and tender. Let cool slightly.
-
- Blend all ingredients until smooth. Add water to adjust thickness and strain if you want a finer texture.
-
- Taste and adjust acidity, sweetness, and salt.
-
- Pour into clean glass bottles and use the hot flip method (filling hot bottles and inverting them to seal), ensuring the pH is below 4.6 for safety. Refrigerate after opening.
Tools You’ll Need:
Gloves, a blender or food processor, a small saucepan, glass bottles, a pH tester or strips, and good ventilation.
Tips and Tricks:
-
- Always wear gloves when handling hot peppers to avoid irritation.
-
- Start with milder peppers and increase heat gradually to suit your taste.
-
- Use white or apple cider vinegar for a clean flavor, or try wine vinegars for depth.
-
- Play with fermented peppers or natural cultures for complex flavor. Add fruit or a splash of spirits for a unique twist.
-
- The hot flip method is ideal for preservation if the pH is acidic enough (below 4.0). Test pH with strips or a meter to ensure safety, as improper acidity can lead to spoilage. My online class at SovereigntyFoodSafety.com covers pH testing and safe preservation. Sign up for updates.
-
- Store in sterilized glass bottles to avoid flavor contamination and refrigerate promptly to maintain freshness.
-
- Fine Dining Tip: Don’t worry if “gastrique” sounds fancy—it’s just a sauce reduction you can master at home! Reduce your sauce with pomegranate molasses and vinegar for a glaze perfect for pork belly or duck. Swirl into aioli for deviled eggs or spike a beurre blanc for scallops.
2. Mayonnaise – Creamy, Clean, and Custom
My mayo story began out of necessity. One day at work, a delivery was short, and I needed mayo for both the restaurant line and a banquet. I’d never made it before, but with my team watching, I grabbed eggs, oil, and a whisk. That first batch was a revelation—creamy, tangy, and far fresher than the gelatinous store-bought stuff I once pictured as pus from an infected wound. From then on, I swore off the jarred version.
Why Make It?
Homemade mayo is fresher, richer, and endlessly versatile. Add roasted garlic, herbs, or sriracha for a gourmet spread at a fraction of the cost.
Quick Method
Blend a room-temperature egg with lemon juice and mustard. Slowly drizzle in neutral oil while blending until thick and creamy. Done.
Tips and Tricks:
-
- Ensure ingredients are at room temperature to prevent separation.
-
- Add oil slowly; rushing can cause the mayo to break. If it breaks, whisk in a teaspoon of warm water to recover.
-
- Swap lemon juice for lime or vinegar, or add smoked paprika or herbs for flavor.
-
- Use a stick blender in a tall container for foolproof results. Use pasteurized eggs to reduce the risk of salmonella, especially for vulnerable groups like pregnant people or those with weakened immune systems.
-
- Store in a sterilized, sealed container in the fridge and use within one week to ensure freshness and safety. My classes at SovereigntyFoodSafety.com cover safe handling of raw egg products. Sign up for updates.
-
- Fine Dining Tip: Blend with tarragon, shallot, and white wine vinegar for a béarnaise-style aioli, perfect with roasted asparagus or poached seafood. Smear under seared scallops with citrus zest for an elegant amuse-bouche.
3. Pickles – Crunchy, Custom, and Simple
Pickles aren’t just cucumbers. Master the brine, and you can pickle carrots, radishes, green beans, or even watermelon rind. My obsession began at a summer farmers’ market when a vendor handed me a spicy pickled green bean that snapped like a firecracker. Back home, I raided my fridge, brining zucchini, cauliflower, and jalapeños in a chaotic experiment. Jars lined my counter like a science project, and my roommate called it “pickle mania.” When we cracked open a jar of dill-kissed cucumbers a week later, we devoured half in one sitting. Pickling is now my go-to for preserving summer’s bounty.
Why Make It?
Homemade pickles give you control over salt, sugar, texture, and spice. Skip artificial colors and preservatives for perfect crunch.
Quick Pickle Method
Ingredients:
-
- 1 cup water
-
- 1 cup vinegar (white or apple cider)
-
- 1 tbsp salt
-
- 1 tbsp sugar
-
- 2–3 garlic cloves
-
- Spices: mustard seed, dill seed, peppercorns, chili flakes
-
- Vegetables: cucumbers, carrots, onions, green beans, cabbage
Instructions:
-
- Heat vinegar, water, salt, and sugar until dissolved. Cool slightly.
-
- Pack veggies into jars with garlic and spices.
-
- Pour brine over, seal, and refrigerate. Ready in 24 hours, best after 3–5 days.
Three Ways to Pickle:
-
- Quick Pickles: Hot brine, refrigerate, ready in 24–48 hours.
-
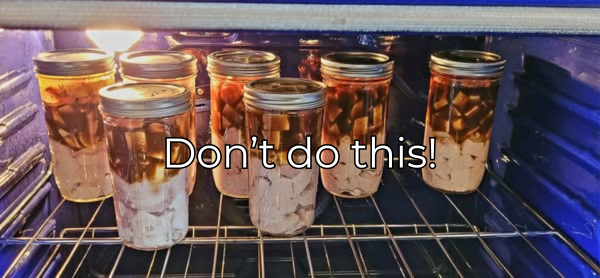
- Canned Pickles: Hot water bath for long-term storage. Ensure pH below 4.6 for safety.
-
- Fermented Pickles: Salt, water, and time for probiotic-rich flavor.
Tips and Tricks:
-
- Use pickling cucumbers or firm vegetables like carrots for crunch. Remove cucumber blossom ends to prevent softening. Add grape leaves or calcium chloride for firmness.
-
- Keep vegetables submerged in brine to prevent spoilage. Use a fermentation crock or airlock for fermented pickles.
-
- Customize brine with garlic, dill, mustard seed, chili flakes, or beer. For sweet pickles, increase sugar; for smoky, add chipotle.
-
- For canning, ensure brine pH is below 4.6 to prevent botulism. Test with pH strips or a meter. My classes at SovereigntyFoodSafety.com teach safe preservation. Sign up for updates.
-
- Fine Dining Tip: Pickle red onions for a vibrant taco or salad topping, or ferment carrots with ginger for a probiotic side to grilled meats.
4. Mustard – From Neon Yellow to Complex & Custom
When I was a kid, mustard was neon yellow, sharp, and acidic—think cookouts and bologna sandwiches. Years later, I discovered Dijon, whole grain, and spicy German mustards, each with depth I never imagined. That was the turning point. I started blending my own, and the squeeze bottle became a distant memory.
Why Make It?
Store-bought mustard can taste flat or overly sweet. Homemade lets you control intensity, sweetness, and texture for a charcuterie-board-worthy condiment that lasts months.
Quick Method
Ingredients:
½ cup mustard seeds (yellow for mild, brown or black for hotter)
½ cup vinegar (white, apple cider, or wine)
½ cup water, beer, or wine
½ tsp salt
Optional: 1 tsp honey or 1 garlic clove
Tips and Tricks:
-
- Age mustard for two weeks in the fridge to mellow heat and deepen flavor. If too bitter, let it rest longer.
-
- Use beer for malty punch, white wine vinegar for Dijon-style sharpness, or add roasted garlic, herbs, or smoked paprika.
-
- Ferment with pickle brine for a probiotic kick, or rest at room temp for 1–3 days for tang.
-
- Thin with liquid if it thickens too much. Store in sterilized glass jars to prevent spoilage and maintain flavor. Refrigerate promptly and use within 2–3 months for best quality. My classes at SovereigntyFoodSafety.com cover safe storage techniques. Sign up for updates.
-
- Fine Dining Tip: Simmer with dried figs, wine, and sugar for a glossy condiment perfect with cheeses or grilled meats. Fold into crème fraîche for a pork belly or charcuterie pairing.
5. Ketchup – Reinventing the King of Condiments
I used to see ketchup as culinary wallpaper—bland, industrial, and forgettable, like chicken fingers and cafeteria trays. Then, a missed delivery at the country club forced me to make it from scratch for a banquet. I blended tomatoes, vinegar, garlic, and spices, and the result was bright, balanced, and rich—not cloying. Members asked what “brand” it was, shocked to hear it was house-made. It stayed on the menu long after I left, proving ketchup can be a statement.
Why Make It?
Homemade ketchup is vibrant and free of corn syrup, letting you craft a condiment with soul for a fraction of the cost.
Quick Method
Ingredients:
-
- 1 can (6 oz) tomato paste
-
- ½ cup water
-
- 1/3 cup vinegar (white, apple cider, or malt. I prefer apple cider)
-
- 2 tbsp brown sugar
-
- 1 tbsp molasses or honey
-
- ½ tbsp onion powder
-
- ½ tbsp garlic powder
-
- ½ tsp ground allspice
-
- ½ tsp ground clove
-
- Salt to taste
-
- Optional: pinch of cayenne
Instructions:
Whisk everything in a saucepan. Simmer gently for 10–15 minutes until thickened. Cool and store in a jar in the fridge for 2–3 weeks.
Tips and Tricks:
-
- Let flavors meld for a day or two in the fridge. Blend for smoothness or keep rustic.
-
- Swap water for coffee, bourbon, or smoked tea for depth. Use fire-roasted tomatoes or chipotles for smokiness.
-
- Sweeten with date syrup or balsamic; infuse with thyme or star anise.
-
- Freeze in ice cube trays for portioned use. Use clean, sterilized jars and refrigerate promptly to prevent spoilage. Check for off-odors or mold before use. My classes at SovereigntyFoodSafety.com cover safe storage techniques. Sign up for updates.
-
- Fine Dining Tip: Reduce with sherry vinegar and star anise for a dipping sauce for duck-fat fries, or mix with horseradish for a refined cocktail sauce.
Take Control of Your Kitchen
Making these staples at home is easier than you think—and the flavor payoff is huge. Beyond saving money, you gain independence, deepen your connection to food, and unlock a world of taste possibilities. Each jar of hot sauce, smear of mayo, or crunchy pickle is a step toward a kitchen that’s truly yours—a place where you create, experiment, and savor. Don’t let terms like “fermentation” scare you; these recipes are beginner-friendly, and my classes at SovereigntyFoodSafety.com will walk you through every step, from safe canning to crafting bold flavors. Sign up today for exclusive recipes, safety tips, and hands-on guidance. Preserve More. Depend Less.